Pages

2.24.2010

Fancy Lickety-Split Birthday Presents

I had to wait until this past weekend was over to post these bags, because the were birthday presents! These are both made with Made by Rae's Lickety Split bag pattern. This first one was made for my friend Shannon. I was trying for a patch-work/hippie look with this bag. I used 8 fat quarters for this bag that I got from Wal-mart. I knew right away that I wanted to use the red batik material. I'm pleased with the result.
Here's a pic of the fabric laid out as I was trying to figure out which fabrics to pair up:


And here's the final bag, both views because it's reversible!:

Here's my final birthday bag for this month. This one was for my mom! After I made my first one I was showing it to my sister, she came over and started looking in to see how may pockets it had. She seemed to really like it. I knew that I had to make her one. I found the fabric at Jo-Ann's.
Here's both views of the bag:


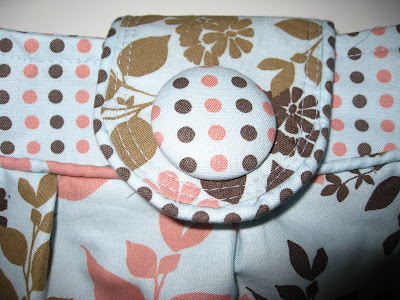
Here's a close up of the pockets and the buttons I found in my Grandma's collection of buttons:


I have another project to post soon. Maybe tonight if my internet doesn't hate me. :-) Thanks for looking!!


Posted by Picasa

2.15.2010

Some Fancy Finished Bags

It's been snowing like crazy here. The third snow storm of February hit today. I finished up two projects in the past few days. The first bag is another Lickety Split bag (again pattern created by Made by Rae). The flap and buttons are not part of the original pattern. This is one is made from the pretty fabric I bought last week at Joann's when I was finally able to get out after the second snow storm. I really love this fabric! I gave this one to my sister-in-law Katie for her birthday. I was tempted to keep it for myself! Did I mention I really love this fabric?

Here's one side:
and here is the reverse:
In the last post I posted some progress show of the Everything Tote I was working on. I finished it this evening. I love it! It's so big and roomy! The pattern comes from Weekend Sewing: More Than 40 Projects and Ideas for Inspired Stitching by Heather Ross.
 Weekend Sewing: More Than 40 Projects and Ideas for Inspired Stitching

The pattern suggested that canvas or denim be used for the outer fabric. I used corderoy because I had some. I had to modify the pattern a bit because of the added bulk. The "bias tape" style binding/straps are supposed 4 layers thick like regular bias tape, but mine ended up being 3 layers thick. It's double in the front, like bias tape, but when I folded it over the top of the bag, I left the strip flat against the lined, and not folded up. I hope makes sense. I should have taken pictures of this process. Maybe next time. Anyways, since I did it this way, I only broke one needle. Yay! Oh, I also stitched the front and back straps together before attaching them to the bag so I wouldn't have to do any hand stitching.

I also did some applique on the front of the bag. It's a pretty, hippy flower. I was going to hand stitch it, but I ended up using a small zig-zag stitch. I'm happy with the results.

Here's my new Everything Tote:

Here's the nice roomy inside:Here's a close-up of the pocket. I used a fancy decorative stitch on my machine:

Here's a picture of me holding it like in the book:
Posted by Picasa

2.12.2010

Fancy Works in Progress

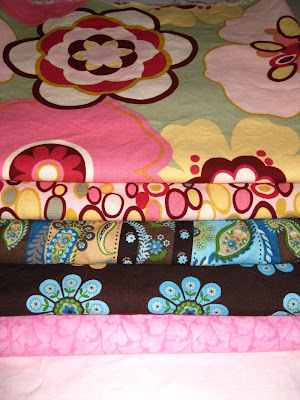
It's been snowing like crazy here. Yesterday was the first time we were able to get out of the house. Rick took me to Joann's so I could get some pretty fabric that is on sale. I think I want to go back and get more of the top one. I think It would make a fun sun dress (I know, I was just talking about snow, but I can dream about nice weather, right?)
Here's what I got:
Here's one of my current works in progress. It's called the Everything Tote. The pattern comes from the book Weekend Sewing: More Than 40 Projects and Ideas for Inspired Stitching by Heather Ross. I'm seeing how corduroy works with this pattern as I already had some. It's going to be a very girly looking bag. I'm trying out applique on this project. This bag is going to be a nice big one, probably big enough to hold my sewing machine!
Here's all the pieces waiting to be put together and the applique pieces waiting to be attached:
Here's a picture of it in the book:
One last picture for this post. I cleaned out the under part of my sewing table so I can open it up and sit a bit more comfortably. I'm posting this for you, Alexis, since you were worried about my comfort. Yay!


Thanks for looking!
Posted by Picasa

2.09.2010

Fancy new Buttercup Bag for me!!

I have had a few projects going on here. I finished a bag for a friend that I will post later and a new Buttercup Bag for me. I wanted to try out a flap closure and a sturdier top and strap. I'm happy with the results. But before that, I have something exciting to share!! I can't believe I haven't posted this yet! Remember those PJ pants? Our entry is finally on the Janome website for the world to see!! I still need to enter in their first contest. I just need to write about how I learned to sew. Both contests end 3/31/10.

On to the project of the post. I finished up a new Buttercup Bag today. I made the larger version that is 129% of the original pattern from Made by Rae plus 2 inches added to the length. It's the same size as the one I made for my mom for Christmas. I thought I would include some pics of the process.

Here's the lining pieces and a pretty pretty zipper:
Here's all the pieces waiting to be assembled!:
Here it is right after I turned it right side out:
And here is the final bag:

This bag included a flap with a magnetic snap. Isn't it pretty??:

Here it is with the matching Lickety Split Bag(also from Made By Rae...did I mention I love her patterns??):
Thanks for looking!! :-)

Posted by Picasa

2.05.2010

Fancy Bible Box!

That's right, the post is titled Fancy Bible Box! I got the box at work, it had a bargain bible in it. I knew that it would be useful for me, but I needed to fancy it up a bit. I promise that this is sewing related.

Here's the Bible Box:
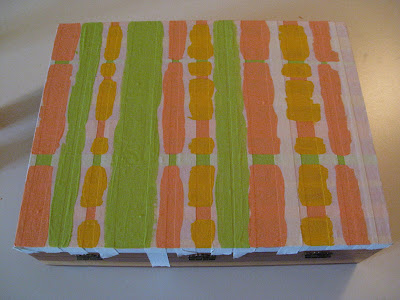
First things first, I filled in the engraving with some stuff called "sculpt or coat" I got at as a sample at USITT (a tech theatre expo thingy for the non-theatre type people). I was glad to see that it was still good, and not all dried up. I thought it would be fun if the box had some texture. Well, after all the coats of paint I put on it, there wasn't much texture left, but that's OK. next I painted the box bright pink and then I painted stripes on it using masking tape to guide me.

This what the box looked like at that point:
Then I put strips of masking tape going in the other direction:
I painted more pretty colors. I wonder how it's going to turn out??


Pretty!! I finished with some varnish. What will I use this pretty box for??It's a thread box!! See, this was a sewing project!


Posted by Picasa

1.29.2010

Fancy Pants!!

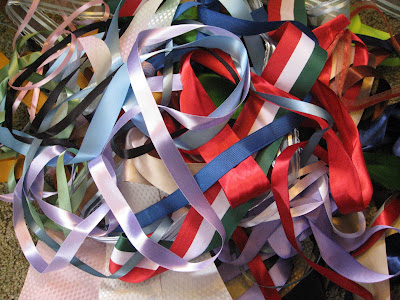
Yesterday was a great day for sewing. I'll show you why in a second. First I want to show off this bundle of ribbon I got for $4 at Hobby Lobby. It's 60 yards of assorted ribbon!!
Okay, now for why yesterday was a great day for sewing. I found a contest to enter to win an awesome serger. The contest was to take one of the selected projects and teach someone how to sew it. I picked the Pajama Pants project to teach. Can you guess who I taught to sew?? First here's a picture of the fabric all cut out and partially stitched:
It's my awesome husband, Ricky!!
I think he did a great job. What do you think?
Posted by Picasa
I have to say that yesterday was an awesome day. I had a lot of fun teaching Rick how to sew and appreciate him for going along with it. And, yes, the pants are quite cozy. :-)


1.26.2010

Fancy Dress, Dice Bag and more!!

Today's Ricky's birthday! It was a good, relaxing day. And now he's playing a bit WoW while I blog a bit. Yesterday I had promised to post something cute I had just finished. Well, I made some spaghetti! No...not pasta...spaghetti straps for a cute dress I made for my niece, Cecilia. I found some pre-shirred fabric in the remnant bin at Joann's and I had to have it and I had to make it into a cute dress for Cece. I took it over to measure it on her and she called me the next day to see if it was done because her mommy was home now. She was so excited, it was very cute. I gave it to her today. Okay, time for some pictures!

Here's the yummy spaghetti:
And here's the dress!:
I found instructions on how to shir fabric. I am determined that I will make something shirred by summer. It looks easy enough, I just have to be brave and hope my machine doesn't eat the elastic thread! I also made a little something for Ricky to match his WoW playing cushion. It's a DICE bag...haha that's right...a bag to put his D&D dice in!!
When I was looking for the bit of dice fabric that I knew I had left, I found a purse I made earlier this month that I didn't post. The pattern comes from Amy Karol's Bend-the-Rules Sewing: The Essential Guide to a Whole New Way to Sew book. It's called the Charming Handbag. It's cute and pretty simple.


The flower I made comes from the Rolled Rose tutorial I found of at Portabellopixie's blog. It didn't roll exactly how I wanted it to, but I like how it turned out.
Posted by Picasa